Marsden Bungalow Radical Retrofit: Timber Frame/ Masonry Hybrid
Our building team is currently on-site working on a really interesting retrofit project, which is involving the addition of an extra floor to a 1980s 3-bedroom bungalow in the village of Marsden at the foot of the Pennines.
It is a design and build project led by us with planning architectural drawings provided by our friend and collaborator architect Derrie O’Sullivan. The clients were looking to increase the space in their family home, while aiming for good levels of energy efficiency. Design constraints included the fact that the roof height could not be raised too high, to fit in with neighbouring buildings and not interrupt neighbours’ views.
Strategy
Various options were explored. We initially proposed an extension at the back of the bungalow turning it into an L-shape but that was rejected as not creating enough space as well as not offering good value for money in adding value to the building.
A nearby bungalow had had a second storey added (in masonry – where they demolished the outer wall of the cavity and rebuilt everything else) and so a precedent had been set.
We needed a strategy to keep the planners happy and not interrupt neighbours’ views. We also needed a strategy to minimize the time that our clients needed to rent alternative accommodation.
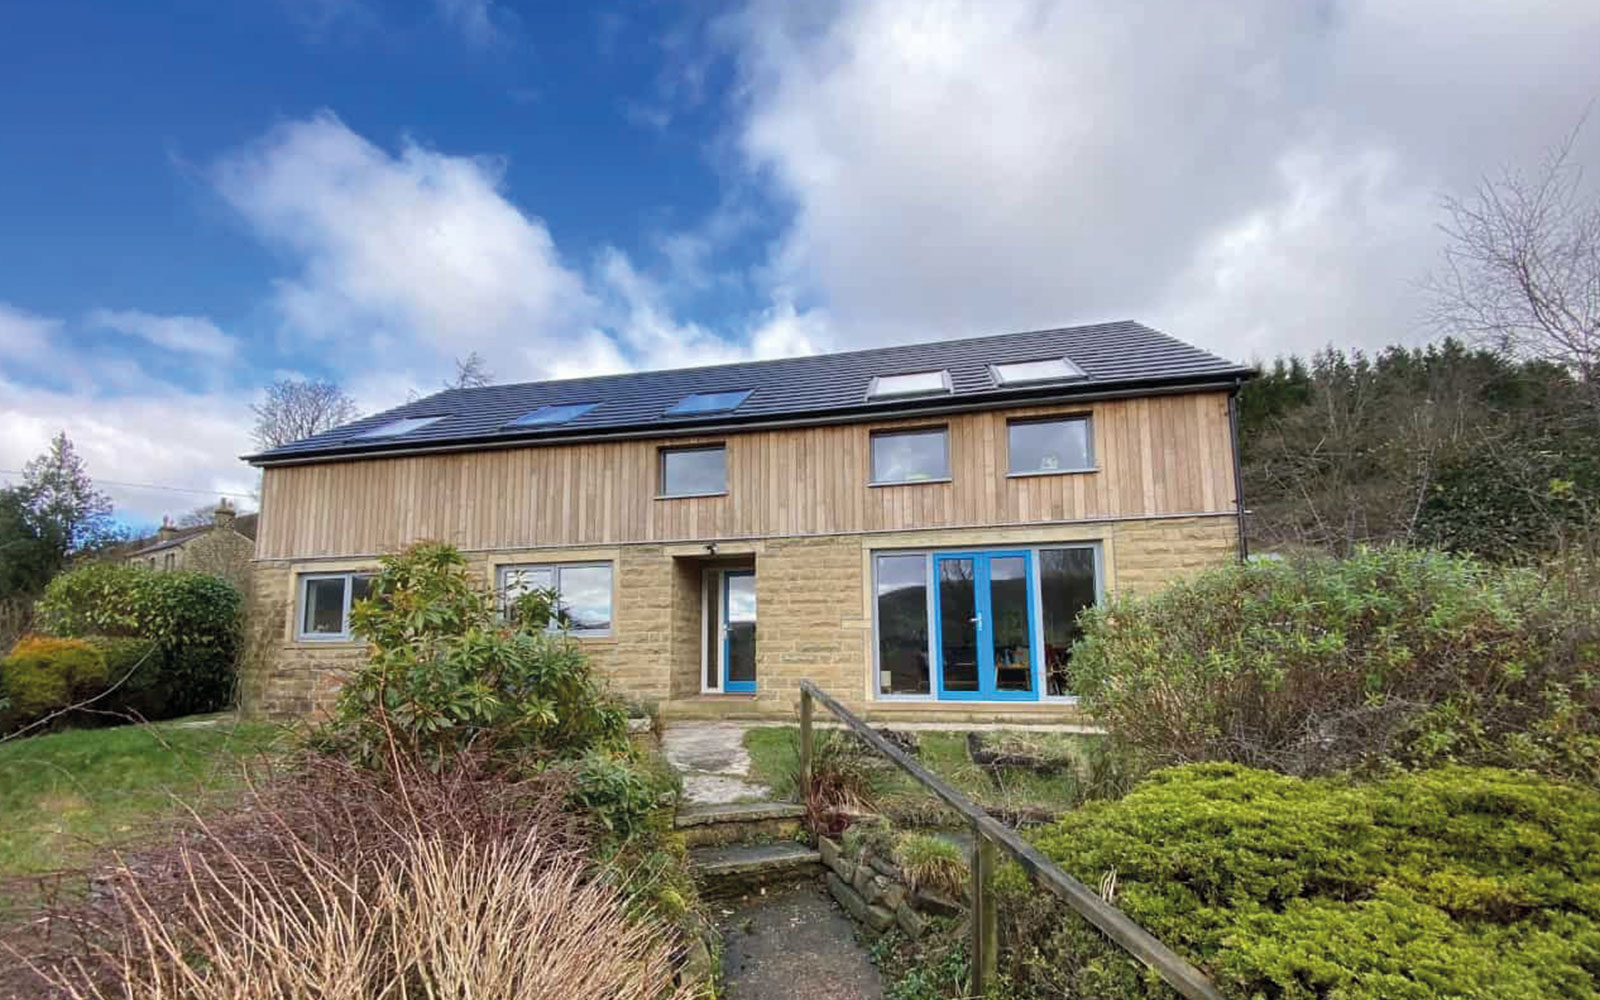
So instead, we looked at a timber frame solution manufactured offsite, with a contrasting façade/ rainscreen of timber. The building team have been really keen to work with timber frame and has been keen to explore ways to reduce embodied carbon in construction. Using timber frame for the upper storey was also more lightweight for the existing foundations and it also had the advantage of being faster to build.
There were clear limits and constraints as to how high the roof could go. Rather than going down the full dormer bungalow route this is more of a ‘one and a half’ bungalow. To minimize the roof height, many of the upper storey windows are mostly rooflights, located in the sloping ceiling. There are a few windows at ankle height, which is a little quirky but does optimize the views!
Improving the existing building
The original 1980s cavity wall bungalow was insulated with blown mineral fibre cavity fill and 25mm of polystyrene internal wall insulation (IWI), fixed with battens and then a layer of plasterboard. However, airtightness was very poor with the dry-lined blockwork and the usual unfilled holes and poor details. This resulted in poor levels of energy efficiency, general drafts and discomfort. To remedy this, we’ve stripped off the insulation and dry lining parged the walls (with a coat of sand and cement), and attended to airtightness detailing using our ProClima tapes around windows and all penetrations and junctions.
We will use 50mm polyurethane IWI, as we’ve used on other cavity wall projects. We have had WUFI modelling undertaken for this. Our detailing, if carefully installed, will ensure that no warm moist internal air gets onto the parged wall and this will work adequately to alleviate the danger of interstitial condensation. However, if the insulation board was installed badly, using, for example, a dot and dab methodology, we would expect interstitial problems.
Triple glazed windows and doors
All windows and some of the doors were replaced with our PERFORMANCE triple glazed outward opening range and with very careful detailing around the installation. The outward opening window has a wider frame which enables the IWI insulation to abutt the frame at the reveal detail. Pro Clima Contega SL tape was used to connect the windows to the inside walls.
In the next blog on the project, I will look at the crucial junction between the masonry ground floor and timber frame first floor and will share our airtightness detailing and our strategies to minimise thermal bridging.
Bill Butcher, Director, Green Building Store


